Dodging and burning is a practice in the darkroom as old as photography itself. Photoshop has built in tools for dodging and burning, but I don’t recommend their use. The reason is that the dodging and burning tools are destructive – they permanently change the pixel values in the image. What we really want is a non-destructive way to dodge and burn, like an adjustment layer. That way we can easily undo, throw away, or correct what we’ve done.
Transforming an Image
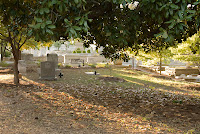
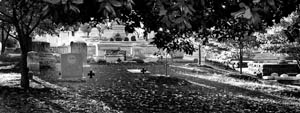
The original below was no better than forgettable, but with some cropping and the other techniques we’ve covered – and some dodging and burning – the potential comes out.

Creating a Dodging & Burning Layer
Make sure the layers palette is visible. Hold the alt key down and click the new layer icon in the layers palette.
This brings up the new layer dialog. If you forget the Alt key, Photoshop will just create a new blank layer and not display the dialog. If this happens, drag the layer to the trash can in the bottom right corner of the layers palette and try again.
With the new layer dialog up, enter a nice descriptive name, change the blending mode to “Soft Light” and click the check box. Each of these is important.
Applying Dodging & Burning
Once you’ve got your layer in place, paint directly on it with either white (to dodge) or black (to burn). Start with low brush opacity and build up the effect you’re looking for. Remember to release the mouse button between clicks. If you need to reverse the effect of what you’ve done, switch the brush color to the opposite one and go back over the area.
In dodged areas, I frequently find I need to add a little contrast, so I do that with a curves layer and a mask.
In the final image, the dodging and burning focuses the eye in the intended area of the image.

Dodging & Burning or Levels Layers & Masks?
You could achieve the same results using multiple levels adjustment layers with masks, but you will probably find when you have to tweak the image a dodging and burning layer is easier.
No comments:
Post a Comment